Friday, March 25, 2011

Tomatoes From Seed


Are you getting an itchy green thumb?  It's hard this time of year.  Winter drags on and on.  You feel like it's been years since your skin has touched the cool, green grass.  The sun is a rare treat, peeking out every few days. 

Remember these?  They grow from a plant and taste different from something very similar that we find in our grocer's produce section. 


It's time.  It's so time.

No, really.  We can get started!  It's six weeks before the planting season here in zone 4.  Time to start indoor seeds.  I've never done it before and I plan to give it a shot this year. 


Close-up of tomato seeds

It's important to consider your region.  I'm looking at "cooler climate tomatoes," many of which are from Russia.  They're earlier maturing and have shorter growing seasons.

For some reason, tomatoes in my garden tend to be very susceptible to blight, specifically a fungus-like pathogen.  So, I look out for the term "disease resistant."

With all the options offered, these will be my two most important while looking for tomato seeds.


Early Tomato Blight


You'll notice the words "determinate" or "indeterminate."  This refers to how the plant grows.  Indeterminates are vining tomatoes which need caging and support.  Determinate varieties are bush types that generally don't grow taller than four feet.  It helps to know this if you don't have a large garden plot.


If you plan to try to save your seeds for next year, you may also keep an eye out for the term "open pollination."

Pollen is released between 10am-4pm on dry, sunny days (WSU extension).  The wind provides a gentle vibration.  Summers tend to be humid where I live.  This year I'm going to try self-pollinating my tomatoes using a small paintbrush (maybe others plants, as well).


I've been doing this with my zucchini for years, when production isn't it's usual ample standard.  But I've never considered doing this for my other plants.  Duh, I guess.

Something else to keep in mind when choosing your seeds is, for what purposes will you be using them?  My main reason is preserving, so I need a canning tomato.  You may find paste tomatoes and salad tomatoes, as well.

The canning tomato has a lower water content, hence a reliably higher acid content.  It's the acid that ensures a safe preservation.  The only foods that may be safely canned in an ordinary boiling water bath are highly acidic ones with a pH below 4.6, such as fruits, pickled vegetables, or other foods to which acidic additives have been added.


Something else to look for is early-, mid-, and late-season.  This is pretty self-explanitory, having to do with how many days until the first fruit matures to ripeness.  Up here, it's nice to have an early-season variety.

You can be sold on everything else, from size to flavor, shape to color.  Just be sure to prioritize.  Other delicious attributes can fall into place after your most important qualifications are met.


This year I've purchased seeds for Illini Star, Clint Eastwood Rowdy Red, Silvery Fir Tree, Legend, and June Pink.  They're all bred for cooler regions, all disease resistant, all open-pollenators, and all canning tomatoes.  All but one are mid-season.  I will count this as my compromise for aquiring all these other Lycopersicon blessings.  The other is early season, that's will hold us over.

Happy growing!

Paper Pots & Indoor Seeds

We don't need to spend the better part of a twenty dollar bill on one of these to make a paper pot for your seedlings.  They're cute, but are you going to start seeds again next year?  Are you going to be able to find the parts to it, when you need it,  and at the same time?  Wouldn't you really rather spend that money on your garden?


Paper pot maker
 
There are some great thrifty alternative ideas online.  You could also call them "green!"  I bumped into my first "discovery" on Cottage Hill, which triggered another research assignment.  Hence today's timely post. 


Robert Gatz, the Chicago Gardener and Lindy from Cottage Hill had the same idea  Lindy uses soup cans while Robert uses a spice jar. 


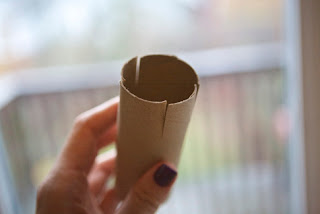
Nettle's Notes and Bonzai Aphrodite both use toilet paper tubes.  This is a quick and easy paper pot that the kids can help out with.

First, be sure you're choosing seeds that really need to have a head start.  I can only speak up as a zone 4 gardener.  I know that there is no need for me to go through all the effort for spring crops such as:

spinach
peas
lettuce
beets
carrots
radishes
leeks
Brussels sprouts
parsnips
kale
collards
cabbage
turnips
chard

Backyard Gardener has some good information to help you determine and learn about your zone.

Start your seeds indoors six to eight weeks before the last frost date in your area.
For us, that's right now.


 * * * * * * * * * * * *


Your seeds will want:

southern sunlight or cool-white florescent bulbs

80-85°F soil temp

clean containers with good drainage

a tray in which to keep your seeds

soiless mix = peat 4 parts, vermiclite 4 parts, perlite 1 part - 4:4:1


 * * * * * * * * * * * *

Your seedlings will need it warm and moist, but not wet.

Place a few seeds in each container.

Follow directions on seed packet for depth of planting.

Cover with plastic wrap to help keep from drying out.

Check twice daily and use a mister to gently moisten with warm water.

Do not fertilize.

 * * * * * * * * * * * *


Less heat and more light as seedling emerge and first leaves begin to open.

Now you may mist with half-strength fertilizer.

Remove the weakest seedlings from each pot.

Begin "hardening off" in April.  Gradually let sit outdoors, a couple hours each day.

Thursday, March 24, 2011

Ribbon and Button Bookmark

 We had a snow day.

In the middle of March.

On Tuesday we were coming out of our 7th snowiest winter on record.  We could see parts of our lawn and most of our patio.  There was real excitement in the air.

On Wednesday we had officially reached our 5th snowiest season on record.  We awoke to yet another winter wonderland, everything covered in white.  Our lawn, our patio, our driveway, our road.

We desperately needed a distraction.  The kids had been bored for months and if I had chandeliers, well I'll just say it's good I don't.

I instructed them to leaf through our craft books and find something.  Two of them did.  One will be featured during the Thanksgiving season in November (Cute Paper Squirrel).  Today's post features the other.


The Family Fun website


Today's Ribbon and Button Bookmark is a page that I saved from my Family Fun magazine but can also be found on their website.  It's a simple project for the kids that is something they can do on their own. 


All you need is some ribbon and buttons.  Tacky glue is the best adhesive for children, it's thicker than Elmer's glue and safer than hot glue.  Just cut the ribbon to about 12 in. then decorate both ends to match (or not!).


Each family member got to pick their own book marker at the end of the day


Posted on The Shabby Nest's Frugal Friday 3-26-2011.

Tuesday, March 22, 2011

Plarn

The ultimate thrift!

  Great 4H project.  Good TV or movie-watching project.  Sure-fire conversation starter.

All you need is scissors, a jumbo crochet hook or jumbo knitting needles, and...

plastic bags.

There are LOTS of ideas and patterns to be found on the www.

Plastic Bags

Cuts cross-ways into strips

Plarn cutting instructions
Plarn balls rolled up


Crocheting plarn


Knitting plarn

Plarn bag


Plarn bag with denim lining and denim belt for strap


Plarn basket, knit into punched holes of plastic base

Plarn basket, with coiled bottom


Plarn rug

Plarn tote with button

Plarn scrubbies

Lining of a plarn bag

Plarn place mat

Plarn tutu

Plarn sandals

The sky is the limit!  Happy plarning!

sewing tips


Debbie at Squiggly Twigs Designs offers a pattern-saving tip.  This would work wonderfully with our larger-sized patterns to preserve them for longer use. 

I love her comment about not spending money on a "one use tool."  A very good point.


Gigi from Behind the Seams shares lots of helpful hints for sewing the perfect top stitch.  Straight and even, professional-looking stitches.  From the size and width of your presser foot to the length of your stitch, she covers everything you need to know in a quick, easy read with lots of photos.


We all know about pinking shears, but Emily from Oliver + s goes one step further.  It's frustrating to work with fabrics that fray too easily.  Your left wondering if your stitching will even hold.  I was impressed with her advice to take that extra step to pink, then stitch down the seam allowance.  Simple genius. 


Mary Ray, a contributor at Threads Magazine reminds us that the way we trim our fabric can make a big difference.  From grading to avoid a visible ridge, to notching for a perfect corner. 

I've found myself forgetting this rule while looking at a bunchy corner.  It's discouraging to find that you need to go back a step.

Happy sewing!

About Me

My photo
As long as I'm on this journey, rambling through life's exhilarating highs and trudging heavily amongst it's incapacitating lows, I might as well share whatever may be gleaned from my little bits of wisdom and my many missteps. No room for judgment from this broken mama. I'm writing from my heart: raw, open, messy, but saved. And I'm still thanking God!